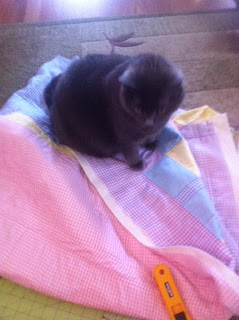
I'd wanted to learn to quilt for a long time, but it was always hanging around my bucket list until the new quilt shop
Crimson Tate opened on Mass Ave. I checked out the class listed and quickly signed up for the "Between Friends" quilting class.
I headed to JoAnne Fabrics to get my supplies. My pattern told me that I needed 17 fat quarters. I picked out a bunch of fabrics, with the help of my wonderful girlfriend Emily who restrained me from choosing every loud fabric I could find, and went to the cutting counter. I didn't actually know what a fat quarter was but I assumed that they would know. That was my first mistake of the quilting process (though I would make plenty more). The woman at the counter, who was quite friendly, told me that a fat quarter was a quarter yard. Oh, I thought. Why don't they just say so?
They don't say so because while, yes, a fat quarter is a quarter of a yard, it is not simply cutting a fourth yard off the end of a bolt. Instead a half yard is cut off the bolt, then that is cut in half width-wise. Whoops.
I came into the quilting class, where I was greeted by Heather, Crimson Tate's owner. She's a former art teacher who has a great way with people. There were maybe 6 of us in the class. We began by cutting out the pieces we would need to form our quilt's building blocks, and this is where I learned of my error. Many of my fabric pieces were too skinny to cut out the larger pieces I needed, so I stressed out for a few minutes, before realizing that this was the perfect opportunity to buy more fabrics. When someday I undergo a fabric hoarding intervention, this will likely be my root.
Some of my favorite fabrics in my quilt are the ones I chose from Crimson Tate. I probably should have purchased all of my fabric from the quilt shop to start with, but I was trying to save a little money. This is a public service announcement to potential quilters out there: quilting is not a hobby that is light on the pocketbook. Your supplies are not only the fabrics for the front of your quilt, but also backing fabric, binding fabric, batting for the inside, many spools of thread, rotary cutters, blades, rulers, mats, and all the other fun quilting accessories you just have to have. However, the longer you quilt the more fabric scraps you will have, so perhaps further down the line I will have enough fabrics that I can make more quilts. Future hoarder, I know.
Over the next few weeks I went to quilting class once a week, sewing for hours in between. I have gained an enormous appreciation for quilters who do all their sewing by hand. I do not have the patience! Finally, my quilt front was ready. The girls in my quilt class helped me sandwich the batting between the front and back fabrics and pin it evenly. I used my nifty new marking pen (the lines disappear once you iron or wash it!) to mark the lines I would quilt over.
Then it was time to quilt. And quilt and quilt and quilt. It took me a couple of months to finish, quilting for a few hours at a time. Emily's parents got me a little quilting table we set up right next to the window.
And then finally, one day I was done. Ok, not quite. Then it was time to make the quilt binding. I found fun brown and blue polka dot fabric and attached it by machine to the front of the quilt, then folded it over to the back and hand sewed it. Then the very last step - I threw the quilt in the washing machine. This removed the lines I drew on, and shrank it just enough to make the fabric puff out a little around the quilted lines.
And, voila!
My very first quilt was complete.
And finally, the toughest critic of all weighed in: Cadence, the Black Arm of Death (that's her full name) deigned to sit upon my quilt. And I knew that it was good.


